Sheathing a Tired, Old Hull
This time in wooden veneers
This time in wooden veneers
In WB No. 228, David Soule describes how he sheathed the hull of his severely deteriorated ketch, using a method developed by Alan Vaitses in the 1960s. In this web-only photoessay, boatbuilder and WoodenBoat School instructor Eric Blake describes another sheathing method, which uses two layers of wood veneer to add integrity to an age-weakened hull. —Eds.
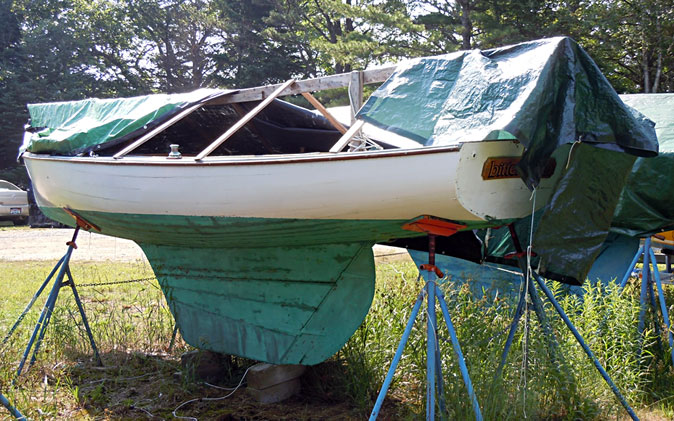
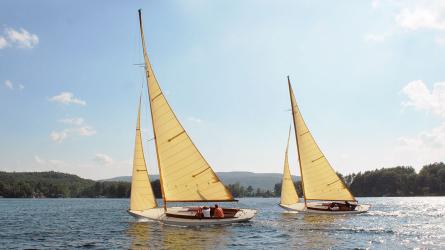
Racing these keelboats hit the Boothbay region of Maine in the early 1930’s. Many wonderful boats, all of them with short bow and stern overhangs, came from that movement, but one of the most popular was the Boothbay Harbor One Design (BHOD) that was designed in 1938 by Geerd Hendel who, at the time, was working as chief draftsman for W. Starling Burgess. (A year earlier, Burgess had designed the America’s Cup defender RANGER.) BITTERSWEET is one of 56 BHOD sloops (many of which are still actively raced) and was built in 1941 by Norman Hodgdon in Boothbay Harbor. Found in the backlot of a local boatyard, her age had finally caught up with her. Planked with cedar on oak, the class always suffered from being too lightly framed, with backbone issues from their narrow fin keels.
About 20 years ago a number of fiberglass hulls were popped out to replace the tired originals. For some owners, this was a solution. But Ted Leonard, who owned BLUE WITCH and INDIA brought both these BHODs to Brooklin Boat Yard for repair. It was decided that a couple of 1/8″ veneers, laid diagonally and glued in place would do the trick. This was a great savings over the cost of a traditional restoration that would still leave the boats with the same structural issues they had been plagued with from the start. Twenty years later, BLUE WITCH’s and INDIA’s hulls are just as flawless as when they were first re-skinned.
While this is not the type of restoration I would carry out on a one-of-a-kind boat with significant historical value, the choice between a cold-molded overlay and the burn pile was an easy one to make.
As a project at the WoodenBoat School this past summer I was asked to do a similar re-skinning on BITTERSWEET. Following is a photo essay of the process.
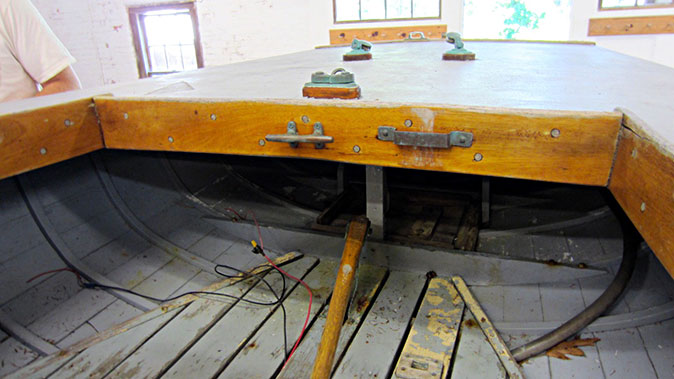
The deck and interior of BITTERSWEET was found to be totally original. The bronze deck hardware and tiller head were still in beautiful shape after 70 years of service. All of the hollow Herreshoff-style cleats, including those at the base of the mast and on the foredeck, were also in fine condition. The replacement cost of this hardware alone would be staggering. Notice that while some of her original frames are broken at the turn of the bilge, the boat had not been filled with a bellyful of sister frames. The original hull shape remained. Sadly, her planking had been refastened three times with a combination of bronze and stainless steel screws with no attempt having been made to remove and replace the existing ones. Her frames, while appearing solid on their inboard faces, had split lengthwise in a number of places due to this over-fastening. All frames would require replacement in a traditional restoration. This task alone would have exceeded the budget.
The first step once the deck hardware and mahogany trim was cataloged and removed was to hoist the hull off the keel and roll it upside down, making it much easier to grind off 70 years’ worth of paint. With the bare wood exposed, the next structural issue was discovered. A common problem with many early fin keel boats is that the single row of keelbolts, combined with a very narrow deadwood with which to distribute the load (in this case 900 pounds of cast lead ballast), cause the keel timber to split along its centerline.
Although the deadwood and lead keel were in good shape and could be reused, two of the five bolts were badly corroded and needed replacing.


BITTERSWEET’s stem also required repair where it had been over-fastened. We did this by grinding away the bad wood and gluing on a new outer stem as shown here.
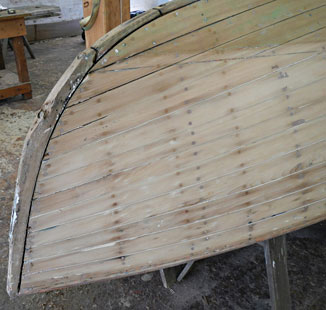
With the hull completely stripped of its paint, all of the cotton caulking was reefed out from the bottom seams as well as up the stem rabbet. These cleaned-out seams were then filled with epoxy thickened with a low density filler. Removing the cotton in the bilge area is important in stabilizing the planking, preventing it from swelling if the cotton were left to absorb water. Here is another view of the stem repair mentioned earlier. A stack of veneers laminated onto the ground-back stem face spans the once-damaged area. The veneers were temporarily held in place with long decking screws until the glue set, then removed so the laminates could be planed back to the original stem shape. The keel timber has been reinforced by gluing on a single layer of ¼″ marine plywood. Here again, screws were used for clamping pressure, then removed once the glue had cured. This single layer of plywood gives the boat’s keel the cross-grain strength required to support BITTERSWEET’s narrow fin keel.
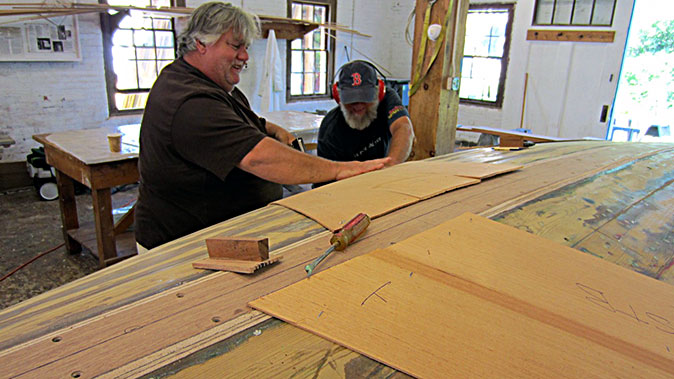
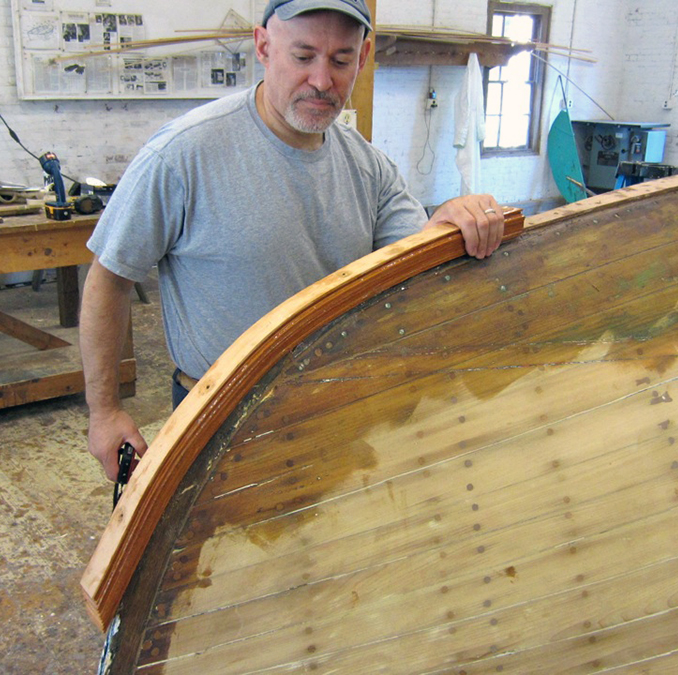
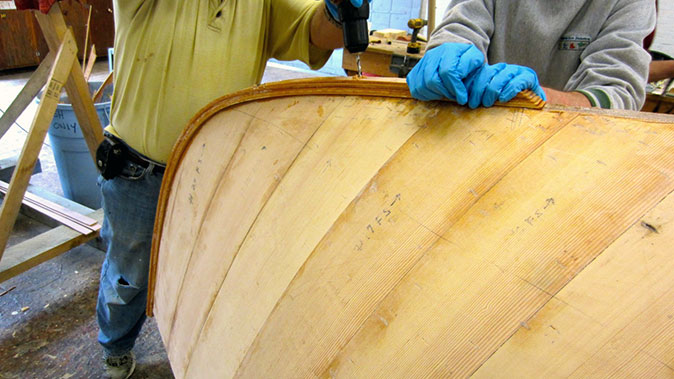
With the corners of the plywood keel reinforcement piece beveled as shown, we start fitting the first layer of veneer. Beginning with a starter piece more or less amidships, the 1/8″ cedar veneers are laid between 30 and 45 degrees off the boat’s centerline. These veneers are about 7 ½″ wide, but there is no magic number as to how wide your veneers should be or what is their perfect angle off of centerline. Let the hull shape tell you; hulls are all a little different. Because the shape of this one changes slightly as you go from one veneer to the next, each piece needs to be spiled for a close edge-to-edge fit. The tool I use for this shows here, laying next to the staple puller. Lay the second piece as close as possible to the first and you will see you are left with an hourglass-shaped gap between the two. By placing the rabbet of the spiling tool against the edge of your starter piece, then place your pencil tip into the notch that slightly overlaps the largest space. Then simply draw the edge of the starter piece onto your next next one. Cut to the line on the bandsaw, and put it back on the boat holding it there temporarily with a few staples. All of the subsequent veneers are spiled and dry fitted the same way until the entire surface has been covered.
With the first layer’s veneers dry fitted, they are all labeled, then removed from the hull—all but the starter piece. Leaving your starter veneers on the hull ensures that the remaining veneers go back at the very same angle location. Epoxy is then mixed and applied to both the hull and the contact face of each veneer. Then a thickened coat of epoxy is applied with a notched trowel and the veneers reapplied using plastic staples. Once a few adjacent veneers have been glued and stapled, be sure to remove the starter veneer and glue it down. All the clamping pressure comes from the staples, so use plenty of them. The fact that they are plastic makes it easy on your edge tools the following day when you give this first layer a quick fairing with a hand plane. Here, gobs of glue and any proud staples, are also being removed in preparation for layer number two.

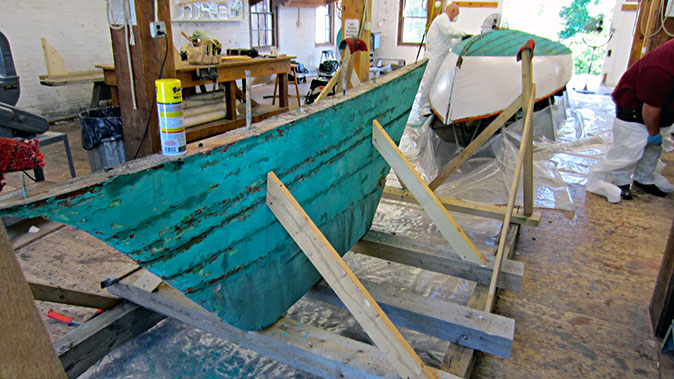
The second layer is a firmer wood, in this case vertical-grain Douglas-fir, that can take more abuse than the cedar. Again, the entire second layer is spiled and fitted dry, labeled, removed, and stapled down all at once. Notice how the widths of the veneers get much more narrow at the aft end where the turn of the bilge is most severe.
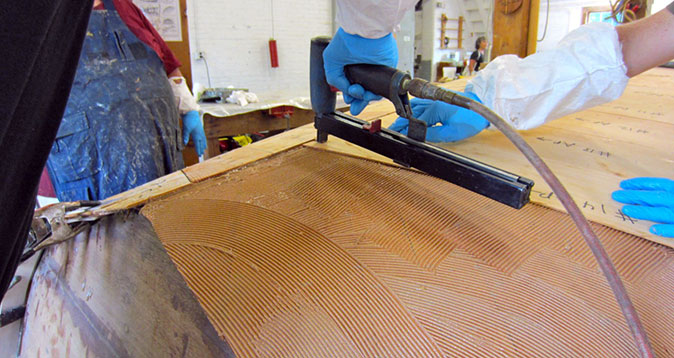
The second layer is now going down in epoxy that’s been thickened with milled cotton fibers and fine sawdust. The staple pressure fills any gaps or voids, giving you an extremely strong cold-molded skin. The fact that the new skin is wood over wood means that the new and the old shrink and swell together. Sheathing a plank-on-frame hull with fiberglass is a temporary fix because the wood and fiberglass expand and contract at different rates, leading to eventual delamination.
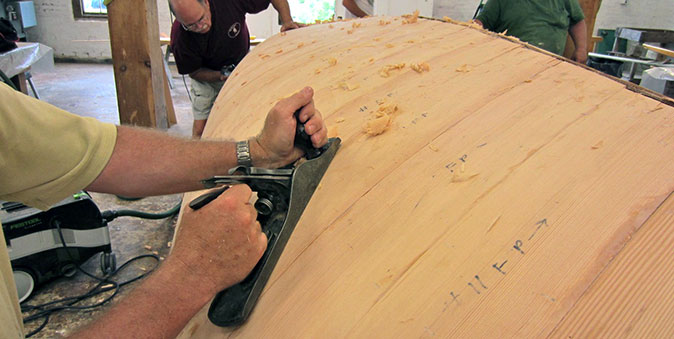
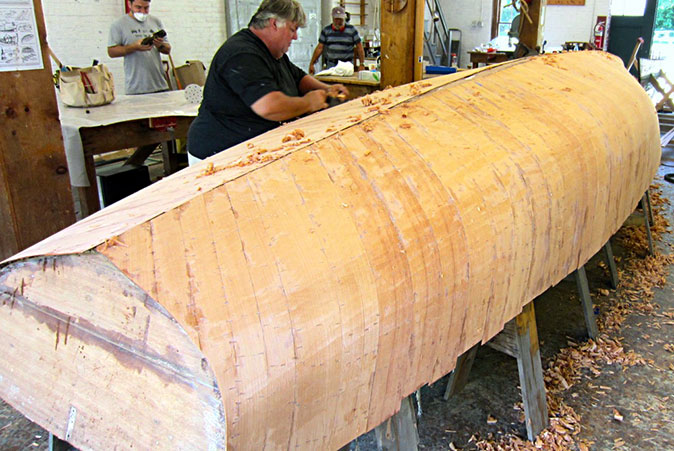
With the second layer glued and stapled down, the final fairing process can begin. I use a long plane with a finely-set sharp blade for the initial fairing. The plane’s long base is great to work off the high spots over a large area, and makes quick work of it. Longboards (large sanding boards) is the next step. Once this fairing has been completed, sanding with electric sanders can begin to remove the scratches—but not until.
After the initial fairing, we figure how much thickness needs to be added to the stem to get us back to the width required for the boat’s stem band and its cast bronze stemhead fitting. It is also a good time to seal the end-grain of the veneers at the stem for durability. Again, for the outer stem, a stack of 1/8″ veneer is glued up and temporarily held in place using waxed decking screws that are removed after the glue cures. Makes for a pretty rugged stem, right?
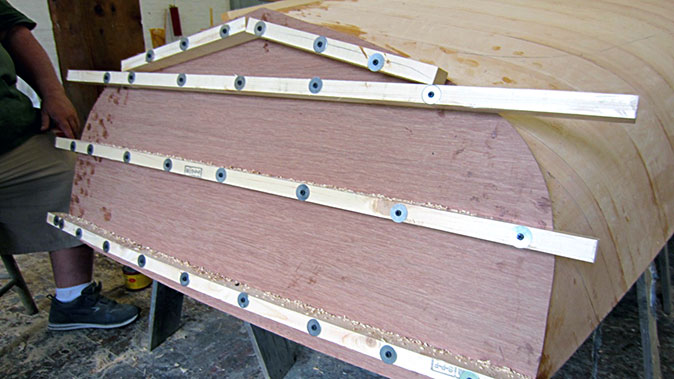
Don’t forget the transom. With the veneers trimmed flush, a piece of 1/4″ marine plywood is cut out and glued on using waxed deck screws through cleats (as shown here) to apply the necessary clamping pressure. This new transom overlay seals the end-grain of the hull veneers as well as that of the old planking, and gives this vulnerable corner some protection.
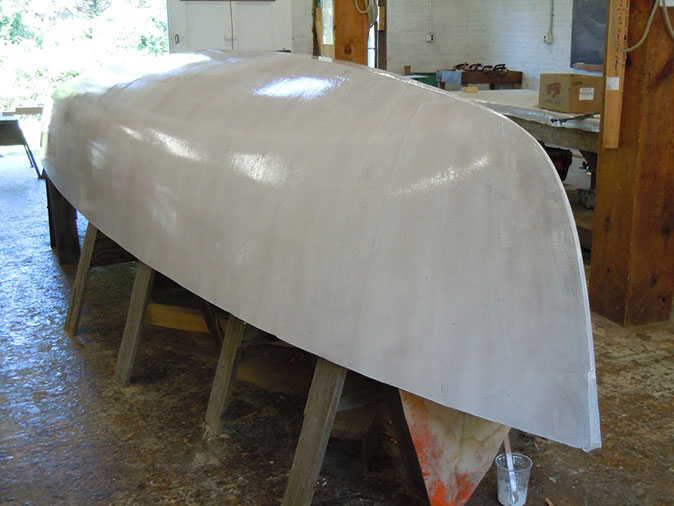
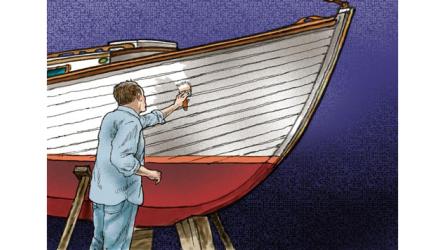
When you’re satisfied with your work so far, it is time to coat the hull with at least three coats of unthickened epoxy. I like to pigment the epoxy so I can see the thick and thin spots and ensure that the hull gets a uniform coat. If you catch the epoxy before it completely cures (known as the green stage) the subsequent coats can be applied without sanding between them. Pigmenting your second and third coat different shades of gray helps get on an even coat, but also tells you where you are at in the sanding process so as not to burn through.
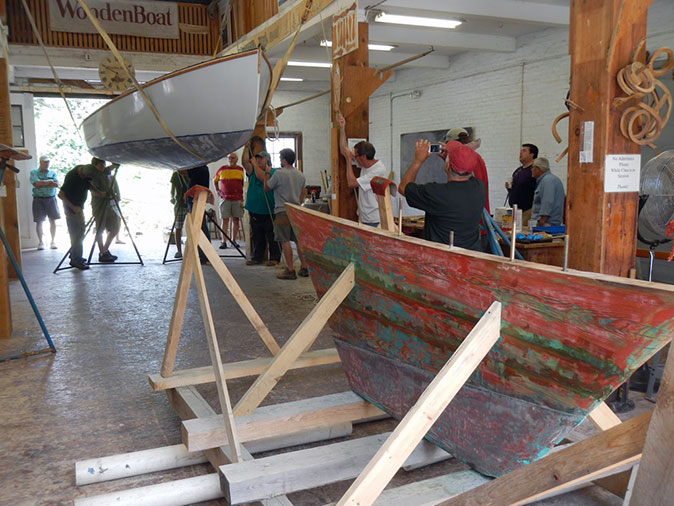
With the waterline transferred back on the hull, it is rolled back upright and hoisted in preparation for re-attaching the keel. Two slings were used along with a two-part block-and-tackle—and plenty of manpower. Notice that the keel and deadwood are still on the boat’s cradle, but under it are some 4″ rollers of schedule 40 plumbing pipe so it can be easily rolled under the boat. The rollers reduce the friction so much that one person was able to roll and guide this 900-lb unit under the boat and align it so the hull and fin could be reunited. This spectacle always attracts a crowd.
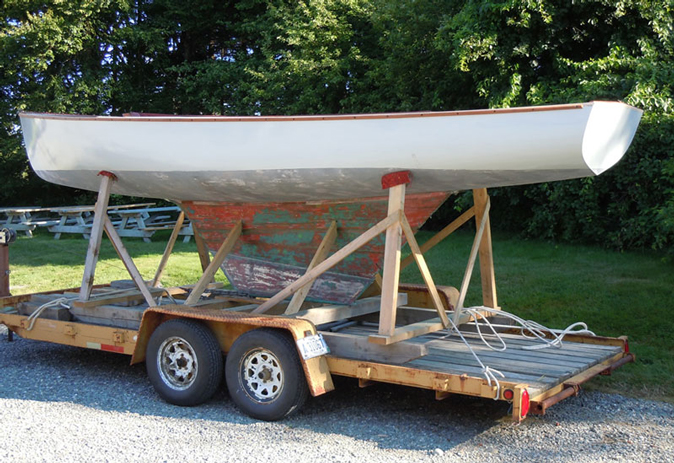
Here is BITTERSWEET back on the trailer after our week’s work, and ready for bottom paint. The thing that struck me about this whole process was how virgin the boat’s interior could be kept. With a good sanding and painting of her bilge, floorboards, and the hull interior above them, BITTERSWEET will be ready for another 70 years of service.
While this re-skinning approach may not be the answer for all tired traditionally-planked hulls, I feel strongly that, based on the project budget, along with the owners’ keen desire to give the boat the strength she needed to be sailed hard without leaking, the cold-molded skin on BITTERSWEET was the right thing to do.
Eric Blake began building canoes in his father’s workshop as soon as he was old enough to run the tablesaw. After graduating from high school he enrolled in the two-year small-boat design program at The Landing School in Kennebunk, Maine. Upon completing that program, Eric spent a year at the International Boatbuilding Training College in England, studying for their City and Guilds exam in traditional yacht construction. Eric has worked at several boatyards around the U.S. He and his wife Molly came to Brooklin in 2004 to take a job at Brooklin Boat Yard, and have been there ever since. Eric is also a co-founder of offcenterharbor.com, an online video production company dedicated to classic boats.